SolidWorks is a popular CAD program. The latest version, SW2008 released in September , has several new features and a new look. This article deals with the new layout of the “View” section of the menu.
Introduction
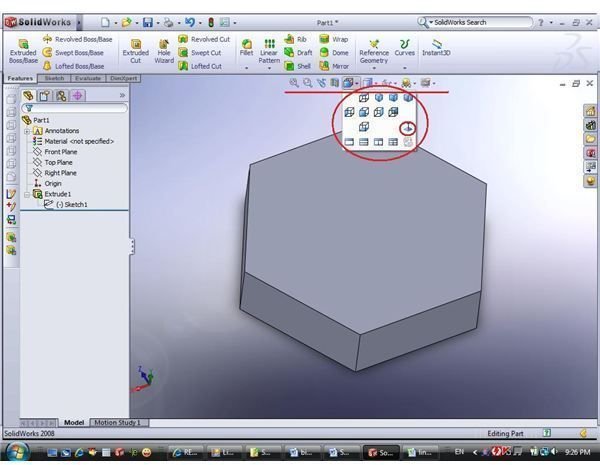
SolidWorks is a popular CAD tool, that is used by millions all around the world. The SW2008, program’s latest version, has been given a new look in order to make the 3D modeling process easier both for experienced and new users. The “View” menu section is now visible constantly, giving you better control over the presented model both during the sketch phase , the feature phase and editing phase. After reviewing the “Sketch” procedure and entities , we are now looking into this novelty.
The view menu
The view menu has several “parts” in it
- Zooming (zoom to fit, box zoom)
- Previous view
- Section view
- View Orientation
- Display style
- Show/Hide options
- Photoworks options (an advanced feature that will not be discussed here)
- View Settings
We will examine each one of them below.
Zoom
There are 2 zoom options available right away – zoom to fit, which makes the entire model visible on your screen, and zoom box, which enables you to define a rectangle to zoom into.
View Orientation
The view orientation tab of the view menu provides us with numerous options for model view:
- Top – Showing the model from above
- Bottom - Showing the model from below
- Right – Looking at the model from the right side
- Left - Looking at the model from the right side
- Front – Model face view
- Rear – Model view from behind
- Normal to – This is a useful feature, making your view normal to the selected models pane/plane and enabling you to construct sketch on it very conveniently. Once you clikc this button, you are prompted to choose a plane. Alternatively, you can select the plane/pane first –in that case the button will make your view normal to that selection.
More options exist for 3D views:
- Isometric
- Dimetric
- Trimetric
In addition, view orientation options deal with window layout, providing us with multi-model view options:
- Single window
- 2 view – horizontal
- 2 view – vertical
- 4 view – aligning 4 different SW windows
Previous view
You can also use the menu as an “undo” and use the “previous view” button to go back to the previous view of your model.
Summary
This concludes the first part of view menu overview. In the next article we will deal with display style and look into the procedure of Section creation.
This post is part of the series: CAD modelling with SolidWorks 2008
Are you a CAD user? An engineer? Product designer? What software do you use? Try SolidWorks - and you may never want to switch back… Already a SW user? This series will give you some useful tips about the latest version, SolidWorks 2008.
- CAD software - SolidWorks 2008 Overview
- Learning SolidWorks 2008 – Creating New Part and Menu Structure
- Learning SolidWorks 2008 – Creating a sketch
- Learning SolidWorks 2008 – Sketch Entities – Part I
- Learning SolidWorks 2008 – Sketch Entities – Part II
- Learning SolidWorks 2008 – Sketch Entities – Part III
- What’s new in SolidWorks 2008 – The view menu – part I
- What’s new in SolidWorks 2008 – The view menu – part II
- Learn SolidWorks 2008 – Extrude – part I
- Learn SolidWorks 2008 – Extrude – Part II
- Learn SolidWorks 2008 – Extrude – Part III
- Learn SolidWorks 2008 – Extrude – Part IV