SolidWorks is a popular CAD program. The latest version, SW2008 released in September , has several new features as well as new look. This article will explain the importance of sketches in SW and the sketch creation procedure.
Sketch Importance in SW2008
SolidWorks unique approach to 3D model creation is based on sketches. Basically, every feature has one or more sketches attached to it – those are the sketches that define the feature. For instance, “Extrude” is defined by the one basic sketch that is “Extruded” perpendicularly to the sketch plane (with certain options of direction, draft angle and thin wall). The “Sweep” feature is defined by 2 sketches - one for the basic Profile and one for Path that the Profile will follow (as the feature is more complex even more options are present).
The logic of the program is such that although other methods exist, throughout you model creation it is advisable first of all to construct the necessary sketches and then use them to create the model’s next step. When you modify certain feature – there are always 2 possible modifications – the feature options (e.g. Extrude height) and the sketch itself (changing the sketch plane, altering the dimensions). This only underlines the importance of sketch in SolidWorks 2008.
Creating a sketch
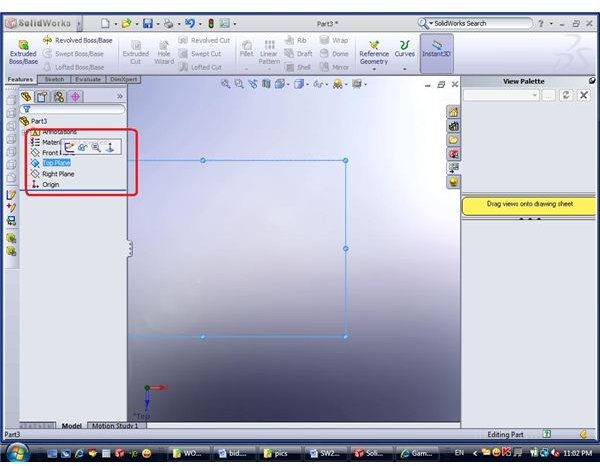
To create a sketch, you should, first of all, pick the sketch plane. If you already have a model, you could just pick any of its panes as a plane for your sketch. Alternatively, you can select one of the principal planes – Front, Top or Right plane. When you pick a plane, you will immediately see 4 icons next to your pointer: Sketch, Show, Zoom and Normal to. Click the Sketch icon (alternatively, you can click on “Sketch” in the Upper menu) – and you will “enter” a sketch. You can recognize that by seeing the “Exit sketch” button in the upper left corner of the Upper Menu.
Another option to create a sketch is to click on “sketch” in the tabs menu, and then pick the “Sketch” feature. Or you can go to the Main menu (sliding) and click Insert-> sketch. You will then be asked to select a plane – once again a model pane or a created plane.
Sketch and exit
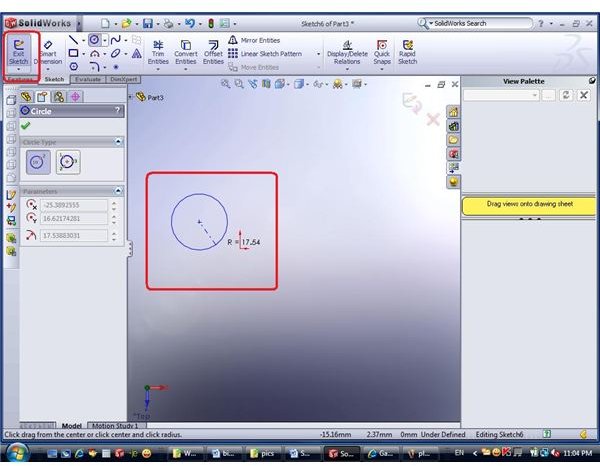
Once you are “inside” the sketch, pick a circle form the options in the Upper menu, choose center point on the screen and drag you mouse to create a circle. Then hit the “exit sketch” button in the Upper Menu. Congratulations, you have just created your first sketch!
This post is part of the series: CAD modelling with SolidWorks 2008
Are you a CAD user? An engineer? Product designer? What software do you use? Try SolidWorks - and you may never want to switch back… Already a SW user? This series will give you some useful tips about the latest version, SolidWorks 2008.
- CAD software - SolidWorks 2008 Overview
- Learning SolidWorks 2008 – Creating New Part and Menu Structure
- Learning SolidWorks 2008 – Creating a sketch
- Learning SolidWorks 2008 – Sketch Entities – Part I
- Learning SolidWorks 2008 – Sketch Entities – Part II
- Learning SolidWorks 2008 – Sketch Entities – Part III
- What’s new in SolidWorks 2008 – The view menu – part I
- What’s new in SolidWorks 2008 – The view menu – part II
- Learn SolidWorks 2008 – Extrude – part I
- Learn SolidWorks 2008 – Extrude – Part II
- Learn SolidWorks 2008 – Extrude – Part III
- Learn SolidWorks 2008 – Extrude – Part IV