Pro-mechanica is a very user friendly software, one of the reasons is because of it’s auto meshing capability. AutoGEM in pro-mechanica controls the meshing. Lean how this works here.
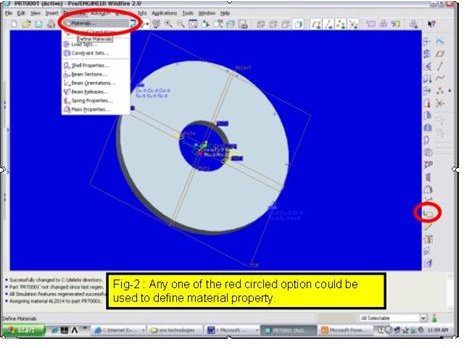
Defining mechanical properties: After selecting the proper model type for a pro-mechanica analysis you have to define the material, in case you have not already done so in standard module while creating the model. For defining material properties you can either go to
Properties>materials.
Or you can use the icon available (click on picture for better view).
By clicking either of the options you will get a material selection window where a list of standard materials (steel, aluminum etc.) are already available, you can even define new materials by entering the required property field.
Meshing
The accuracy of any FEA is depends on the quality of mesh. Pro-mechanica uses P-element method for creating meshes where as majority of other packages use H-element method.
Using P-element has a number of advantages:
- Automatic mesh generators works better.
- The same mesh can be used for convergence analysis in the case of p-element, where as h-element requires deleting old mesh and new mesh needs to be recreated for refinement.
- Since same mesh is used throughout the analysis in case of a p-element, the meshes can be tied directly with geometry. That’s why pro-mechanica can perform optimization and sensitivity analysis, during which geometry of the body can change but the program does not require recreating the meshes again.
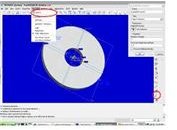
AutoGEM: For creating meshes you may either go to
autoGEM>create
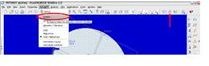
or you can click the icon shown by the arrow in the picture.
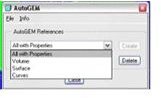
After you click you will get a dialog box:
In the drop down menu you can see four different options for creating meshes.
If you select all with properties then you have to directly click to create a button. Pro-mechanica will automatically mesh all the entities wherever material a property has been defined.
If you want to mesh the volumes, surfaces or curves separately, then you have to select the respective option of the drop down menu and then the geometry selection arrow will be activated, by which you have to select the proper geometry. Then you have to click on the create button to mesh.
After meshing pro-mechanica will show the summary of the elements. If you don’t want old mesh available with the model you can click on the delete button before starting the meshing. For coming out of autoGEM once you click on close button after meshing it will ask whether to save the mesh or not you should always click on save.
AutoGEM Controls
If you want to increase the mesh density in a particular area or you want to create more numbers of nodes in particular area of your model, then you have to use this option. Go to
autoGEM > control
or click the icon encircled in the picture to open the autoGEM control dialogue box.
Now give a name to the control at the name field of the dialogue box. In the type drop down menu there are two options, namely edge distribution and minimum edge length.
In edge distribution you have to select the required edge where you want to control the number of nodes and then you have to select the number of nodes you want on that edge.
For minimum edge length option, you have to specify the minimum edge length. Pro-mechanica will ignore all the edges below that distance for meshing. If you check the % check box then pro-mechanica will consider minimum length as the percentage of maximum edge length.
If you check and select the edge to keep that edge will be retained by pro-mechanica even if it is smaller than the minimum edge length specified.
AutoGEM Settings
To open autoGEM settings dialogue go to:
autoGEM>settings
autoGEM settings have three areas:
-
Feature Isolation: If you check the options available in this area, then pro-mechanica will refine the meshes to the area where singularity is occurring (i.e. stress concentration is happening).
-
Settings: Enables you to control various characteristics of element creation like, element types etc.
-
Limits: Enables you to set limits for the element creation and editing. By changing the limits here you can change the number of elements.
This post is part of the series: Pro-Mechanica Tutorial
Pro-mechanica is a FEA module of pro-engineer. If you complete reading this series and do practice as required then you will be able to do analysis using pro-mechanica, of course you should have basic knowledge of pro-engineer or other 3D cad package.
- Pro-Mechanica Tutorial Part 1: Introduction to FEA
- Pro-Mechanica Tutorial Part 2: AutoGEM & Meshing
- Pro-Mechanica Tutorial Part 3: Structural Loads
- Pro-Mechanica Tutorial Part 4: Thermal Loads
- Pro-Mechanica Tutorial Part 5: Thermal Constraints
- Pro-Mechanica Tutorial Part 6: Structural Constraints
- Pro Engineer Mechanica Tutorial Part 7: Analysis and Design Studies
- Pro-Mechanica Tutorial Part 8: Reviewing FEA Results