How to Build a Water Ionizer? Making a Water Ionizer
Introduction
Water ionizer is a type of water filter which ensures that the drinking water is devoid of any waterborne contaminants. Apart from providing germ-free drinking water, a water ionizer also ensures that there is enough of oxygen dissolved in the water. Many types of water ionizers are available in the market; however there is no surety that the water they provide is 100% pure. Therefore making a basic water ionizer at home is better than wasting money on unreliable commercial products. In this article we will learn how to build a water ionizer at home.
Basic Principle
Before we get into the process of making a water ionizer, it is important that we understand the basics. The first and foremost thing that is required is to check the quality of tap water that we will be using. Though many water testing kits are available in the market, the best way to get a water sample analyzed is through a certified water laboratory. The main reason for testing the water in a laboratory is to find the amount of dissolved oxygen and pH. The amount of pH in water can also be checked at home by using litmus paper or with an electronic pH meter.
A water ionizer works on the simple principle of electrolysis. Any type of water ionizer has two electrodes put into a container having two chambers separated by a semi-permeable membrane. The two electrodes - positive and negative, are put into two separate chambers and a 12 or 14 V of current is passed through them. Ionization process takes place on passing of the current through the electrodes. The dissolved minerals get attracted either to the positive or negative electrode and gets stick to their surfaces. Thus one of the chambers will have acidic water while the other will have alkaline water. The alkaline water is for consumption purpose, whereas the acidic water is for disinfecting or sterilizing purposes.
How to Build a Water Ionizer
Making a water ionizer at home will prevent unnecessary wastage of money on unreliable commercial water ionizing products. Let’s take a look as to what all things we will need for making our own water ionizer.
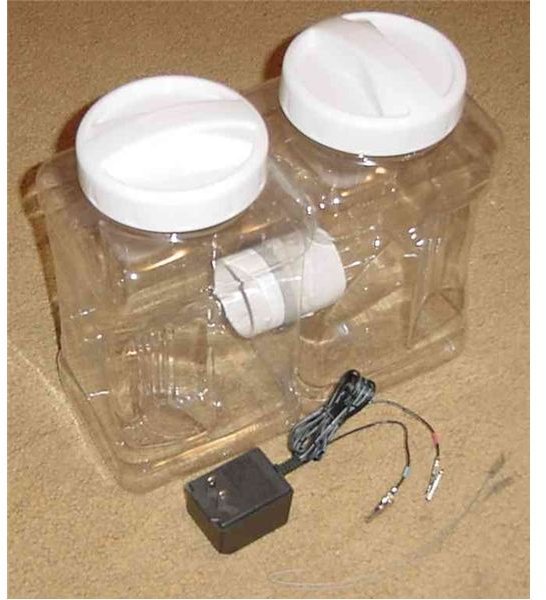
The first thing we would require is two plastic containers of one gallon each. The two containers will provide separate chambers for the electrodes. Titanium electrodes are supposed to be the best ones; however aluminum and copper electrodes are generally used by the companies. We will also require a two inch small PVC pipe, a small piece of chamois, a few alligator clips, electrical wire, 12 or 24 V power system, and two copper or titanium or aluminum electrodes, according to the size of the container.
Process
- First take the 2 plastic containers and make a two inch hole on one side of each of them. Now place the two containers next to each other in such a way that the holes on the container sides align with each other.
- Take the PVC pipe and insert the chamois piece inside the pipe such that it fills it up completely throughout the length. Then insert the pipe into the holes such that it connects the two containers. Make sure that the holes are made at the very bottom of the containers.
- Take the electrodes and connect them with an electrical wire
- Connect the alligator clips to the wire connected to the electrodes and to the 12 or 14 V power system.
- Place the electrodes in the containers and turn on the power.
As soon as the power is turned on, the electrolysis process will start. In around two hours, alkaline and acidic waters will start separating in to different containers. Water in one of the containers will become brown in color, depending on the amount of impurities present in the water before the electrolysis process. The other container will contain pure alkaline drinking water. Small plastic taps can also be attached to each of the container for taking out the water. Thus, a self-made water ionizer provides a cheap and affordable method for acquiring pure drinking water.
References
Image credit
