Creating sketch relations in SolidWorks is very useful feature. This article continues the overview of understanding the process of setting the interaction between sketch entities in order to completely define your sketch. It deals with line-to-curve and line-to-arc relations.
Introduction
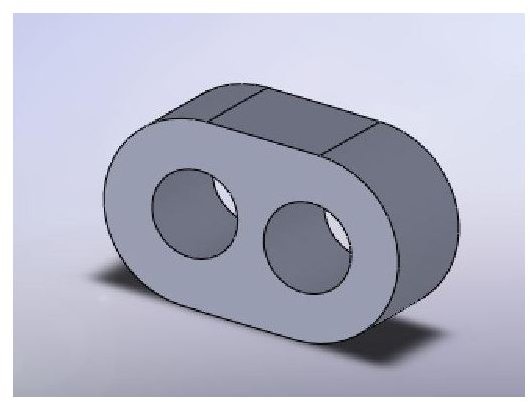
Now, when you are familiar with sketch entities relations feature, it is time to explore it a little bit more. Or course, you have not only lines – but also curves, arcs, circles etc. Those have certain relation options as well. Lets say we want to create this part:
Part
Process definition
It is also many times desirable, to have it center aligned with the axis origin. So, let’ construct a sketch. Right-click on one of the principal planes and create a sketch.
Now, create 2 lines and 2 arcs. The arcs can be 3 point arcs. Notice, there is no relations on the sketch (which is, actually, not very clever – we could create lines as horizontal already – but we will define it in a minute).
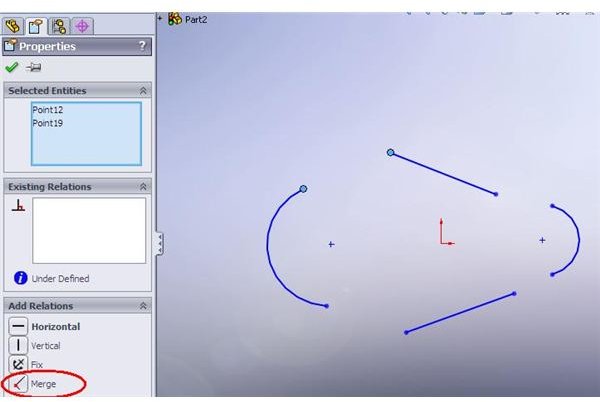
Merging points
Ok, first of all, let’s connect the lines with the arcs – select both the endpoint of a line and the endpoint of relevant arc (remember, by holding CTRL you can select multiple entities). Relations properties will appear on the left of your screen. Select “Merge” – and see the points combined.
Equal arcs and lines
Repeat the process 4 times to connect all lines and arcs. Next, let’s define arcs and lines as “Equal”. Select 2 entities (either arcs or lines) and pick “equal” relation. Repeat the process for a second pair. Notice that the arcs are of equal radius but different length.

Tangent Relation
Now, let’s define the both lines as horizontal (selecting on by one).
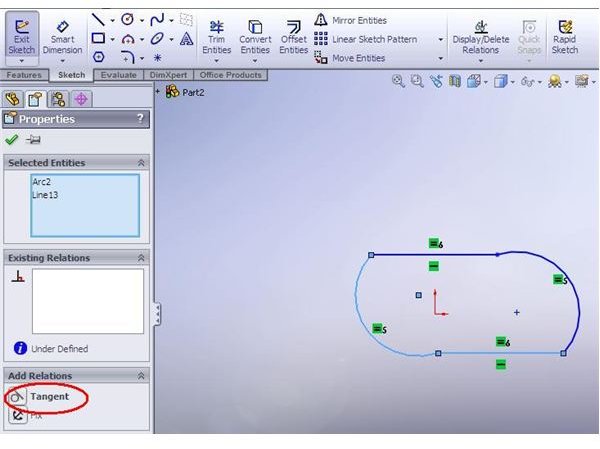
At this stage we need to define the tangent relation between the line and an arc. To do that – select 1 line and 1 arc (by using CTRL for multiple selection) and pick “Tangent” relation. Repeat the process 4 times – to make all arcs tangent to lines. Remember, you have to make sure that the “tangent” sign is shown on your sketch – even if it “seems” that the arc is tangent to the line it may actually not be!
More to come
The profile is almost complete – now we need to define “holes” and also to position the sketch relative to origin point. And, of course, we need to dimension the sketch and extrude it symmetrically. How to do that? Read the next article!