Unigraphics Tutorial on UGS Material Assignment, UG NX 6 Material Properties Tutorial
You know how important the material selection process is for a design engineer. Setting the materials are not compulsory for Unigraphics models, but if you want to use your UGS models for analysis (I have an article on Ansys material properties tutorial), mechanisms, or mass properties calculation, then you need to set the materials and for doing so, you will find this UG tutorial useful.
How to Assign Materials in Unigraphics
-
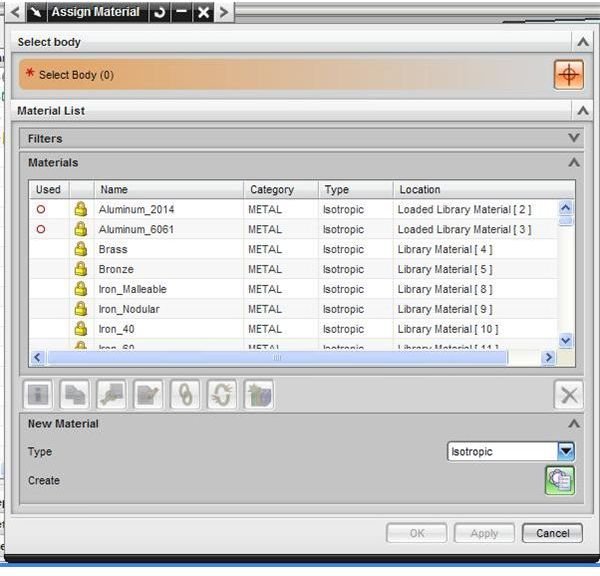
You will find all the material related UG operations in the Assign Material dialog box. And, you can open the dialog box by: Tools→Material Properties.
-
Now, you can either use an already available library material or create a custom material and use it for your design. In real time mechanical design projects, most of the time you have to go with the second option.
-
For both of the methods, first you need to select the part/parts by clicking the parts/parts from the UGS model window. As soon your part/parts selection is complete you will notice the number just after the Select body will change from 0 to the number of parts you have just selected. Also, a small green arrow will appear before the Select body.
-
For, using the available material from the material list of the Assign Material dialog box, just click on the material and before clicking the Apply button click the Info icon (i) and you will be able to see the material properties of the material.
-
You can create the new custom material in two methods:
- By editing the material properties of an available Unigraphics library material.
- By entering all the material properties values freshly and create a brand new material.
-
For editing an already available material (say, brass), click on it and then click the copy the selected material icon (second icon). By now you will see the next icon (edit the selected material) has been activated, click the icon and the material dialog box will open like below:
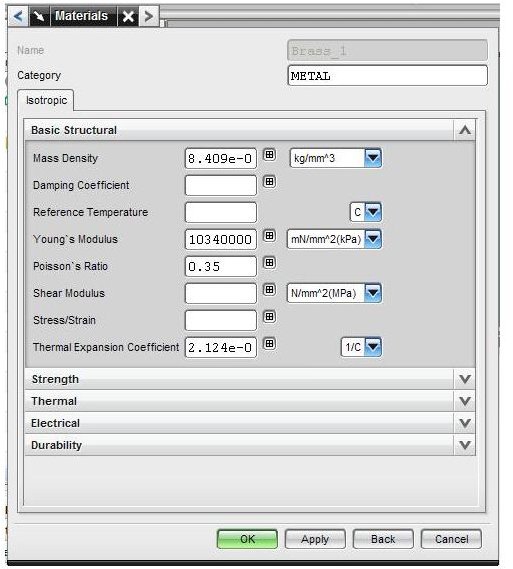
Edit the required material properties values and click OK. You can rename the already edited material by clicking the Rename the selected material icon.
- For creating a fresh material, you have to go to the new material section of the Assign material dialog box. Select the suitable type from the Type drop down list and hit the Create material icon. And you will find a dialog box somewhat similar to the edit material dialog box but completely blank. You have to give a name as well as fill all the material properties fields. And click Ok.
Conclusion
As this UG tutorial explained, you can assign UGS material to your Unigraphics model by three ways: selecting a material from the available list, edit a material, and creating fresh material by entering all the material properties.